As part of the Know your WordPress series, this post covers the most significant things to do after installing WordPress. If you have freshly installed WordPress for your website/blog, you must get these things done as soon as possible.
As part of this series, you have seen
- Find out the difference between free WordPress & self-hosted WordPress.
- How to get a web hosting plan on a featured hosting service provider?
Knowing all this, you just need to set up your WordPress blog rightly. This guide will walk you through those steps.
Let’s begin without further adieu😉
Significant WordPress Settings to change after installing WordPress
Installed WordPress. Now what? Many have the same question initially. Didn’t you? The installation comes with a lot of default WordPress settings, which you may not need. So first things first…
Note: I have prepared this guide, assuming you have not changed the default theme. Installing a theme would change certain settings, which I will explicitly mention.
1. Change the title, time zone, and favicon

By default, the site title and tagline(optional) may not appear. Since it is the brand you’d be representing and promoting, you need that to be visible to everyone. Hence it’s important to set that up, here’s how you can do it.
Login to the WordPress dashboard and head over to Settings and General. You should see the following screen as shown in the image below.
Next, scroll down, and you should see the time zone section. Change that accordingly and do it right. This time will be helpful for scheduling posts in the future. Also, the time zone will help you show the accurate time of the post-update/publish. Use this tool to find the exact UTC you’re in to avoid any mistakes. A simple Google search such as “<your city> timezone” will also help.

Get down at the bottom of the page and click on the ‘Save’ button.
Next is changing the favicon. A favicon is a short form of Favorite Icon, which is an icon that appears in the tab next to the page title. Many users do not change the favicon and let it be the default that came from hosting providers like Bluehost.
If you already have the logo ready, just create a 512×512 version of it, as this is the recommended size for a favicon. If not, create a logo for free online with helpful tools like Canva.
2. Delete default posts, page, plugins & comments
In your WordPress dashboard, click on Page » all pages, and then delete all the default pages. Do not delete the home page, you can design it later. Similarly, find the Posts section in the dashboard and delete all the posts, you can create it by just clicking the button “Add new” under the posts section. Repeat this step with comments too.

Furthermore, WordPress comes with a bunch of plugins installed by default, which you don’t have to keep. A classic example is Hello Dolly, it’s simply a plugin that literally does nothing but shows lyrics of the Hello dolly song on the top right of your admin dashboard. It was the very first plugin developed by Matt Mullenweg, the founder of our very own Automattic Inc, that powers WordPress.com, Woocommerce, Jetpack. He came to the limelight after developing WordPress and making it open source.
To delete the plugins, simply go to Plugins » Installed Plugins and deactivate and delete the plugin. Make you properly delete the WordPress plugin to avoid any residuals.
3. Customize permalink structure
Permalink structure is a short form of Permanent link structure. It is important to have a search engine-friendly URL with respect to SEO aspects. The default permalink structure is not search-engine friendly, hence it becomes important to change it.
To change the permalink, go to Settings then select Permalink from the menu. There you can see various structures of permalink that you can have for all the URLs on your website/blog.
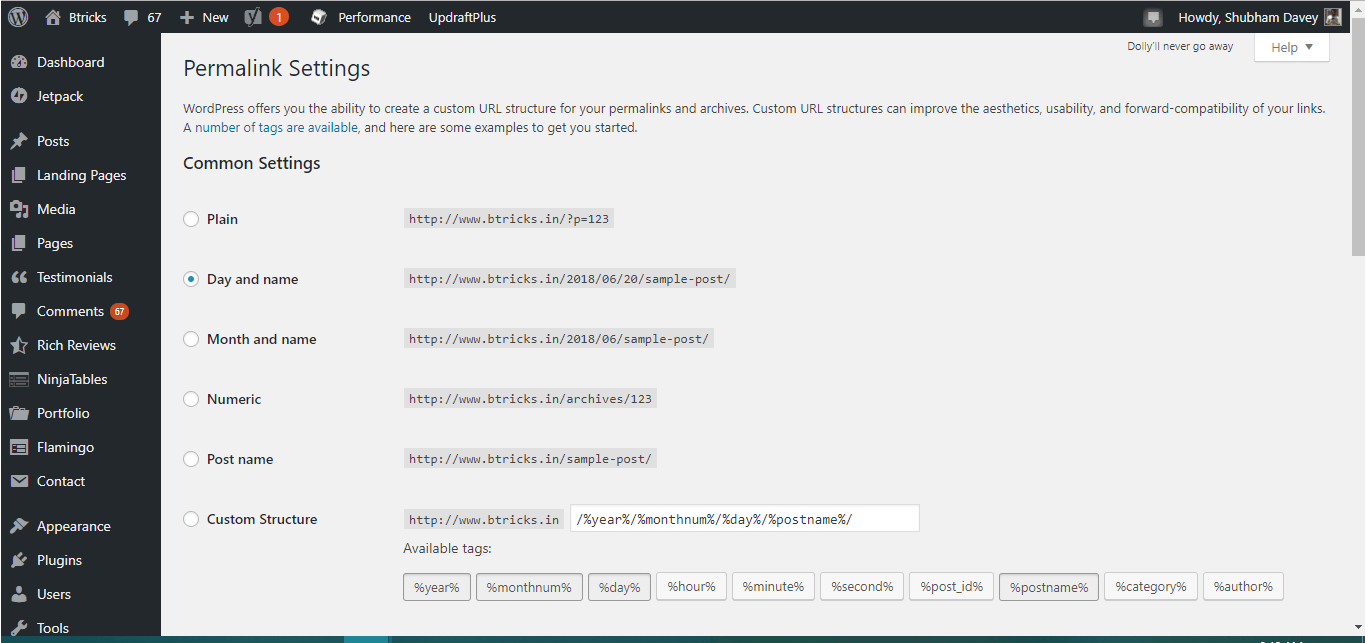
I would recommend to chose a post name, as it’s the most search engine-friendly structure and highly readable. Furthermore, this structure gives enough space to have keywords in the URL.
4. Set up discussion/comments settings for your WordPress blog
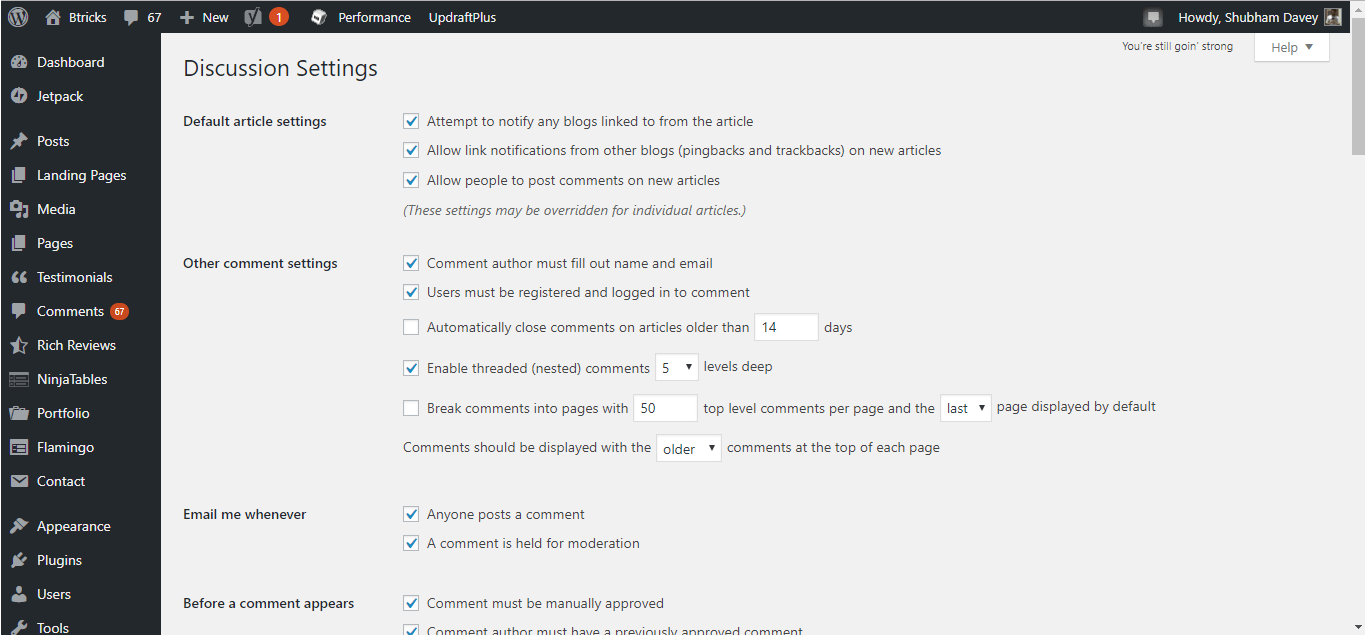
You’d be making a lot of buzz, so set up your discussion/comment section before that. Read through each option and check/uncheck accordingly.
5. Configure reading settings
Hover on Settings » Reading, and you should see the screen shown above. Depending on your requirements, you should choose the homepage settings. Remember, if you opt for a static page, choose the home page of your website/blog & choose the Posts page for the Blog section. Furthermore, spend some time on homepage SEO as it will be the face of your brand.

If you go for A static page option, you would need to design the home page from scratch depending on the theme you use. You can always change these settings whenever you want.
6. Update Ping List
These are important and beautiful settings to get traffic to your blog. Whenever you publish a post, WordPress sends a ping to all the ping services, which further notifies the search engines. The search engines send the crawlers as a response to the ping and fetch the updates.
By default, WordPress has only two ping services listed. To change this setting, go to Settings » Writing and find the Update Services section.

Copy-Paste the ping list available in the doc file here. Double-check the entries, scroll down, and click save.
7. Delete unused theme(s)
If not already, WordPress will install a default theme on your blog. It’s obvious that you wouldn’t have that theme. Furthermore, you would have tried & tested themes that suit your blog idea and/or the purpose of your website. Once finalized, you would need to uninstall the unwanted themes to free some space on your web hosting server.
Those who have limited space should definitely do this. Benefits of doing this?
You’ll have space for more important stuff, page speed & faster server response. Also, there would be never-ending updates eating up space and data to update it.
To delete a theme, hover over Appearance » Themes. Click on the themes you want to delete and press the delete links on the bottom right of the theme details window.
8. WordPress Media settings
To uniformly manage your media files, these settings will come in handy to you in the long run. By default, WordPress creates various sizes depending on the media. To streamline this, you need to have a standard size. To update these settings, simply head over Settings » Media and you should see the following screen.
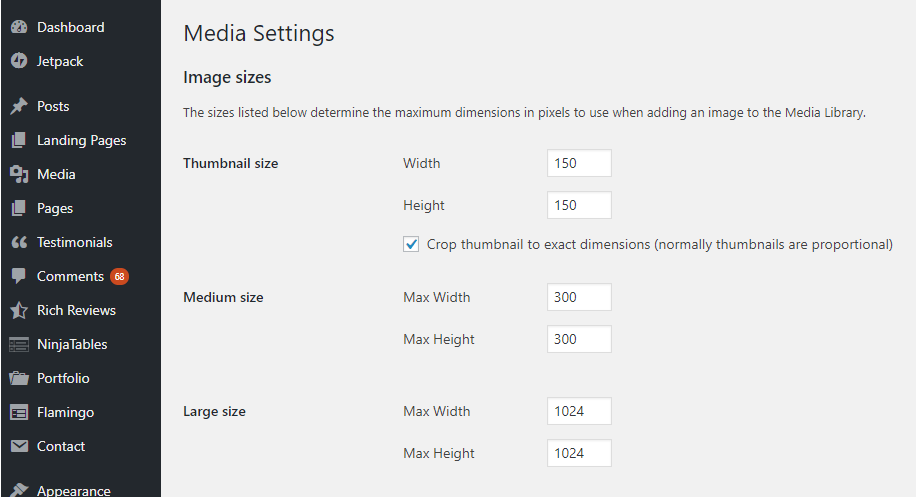
Change all these values to zero and save them. This will stop WordPress from creating various sizes of media you upload.
9. Install Cache Plugin to speed up your blog
As you start rolling, webpages of your website/blog will take time to load. Caching will help offload the server’s burden to deliver content to the end-users request. On the SEO grounds, this will help you a lot, as your webpages load faster, and reduce server response time.
I personally use W3 Total Cache for this blog. This plugin is the most powerful tool when it comes to caching. The CDN integration in this plugin is a great way to make your blogs faster than ever. For first-timers, the settings under this plugin will be a lot to digest, but don’t worry, here’s a guide to it exactly the way you should.
Alternatively, there WP Total Cache which is equivalent to the aforementioned plugin but it lags in so many ways. Efficiency is the first one and user-friendliness being the second. However, if you have to choose this plugin, here’s a guide to properly set this plugin for the best results. Obviously, this plugin also has a lot of bewildering settings that can crack your brain at first sight.
10. Improving WordPress Security
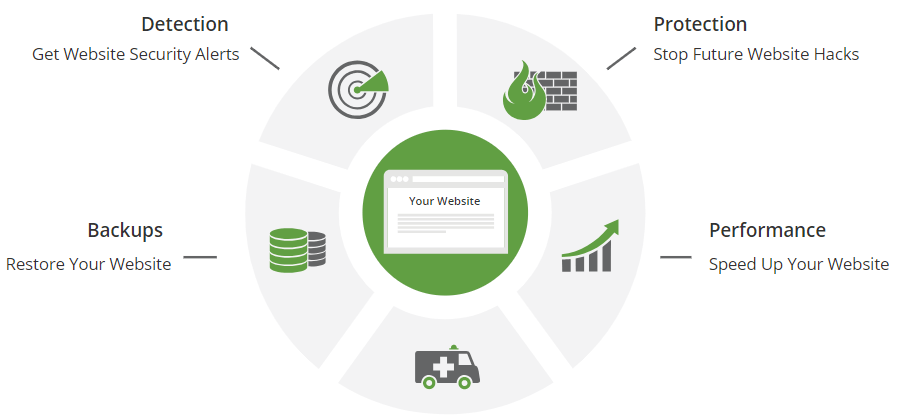
When it comes to having a website that runs across the globe on the web, the security to protect it is a must. To protect your website from unauthorized access and many other cyber attacks, you need a plugin that does the heavy lifting for you.
In this context, the first plugin that comes to my mind is Sucuri. Sucuri does a great job of protecting your WordPress admin area.
11. Install an Anti-spam plugin

Spam is the worst garbage on the internet. No one likes it. You, too, want to avoid it in your spam, right? There are plugins for moderating spam comments on your blog.
To avoid the problems that come with spam comments, you should install one of the plugins mentioned below.
12. Install an SEO WordPress plugin
If the content cannot reach the right audience, it’s pointless preparing the content in the first place itself. Hence installing an SEO for WordPress plugin will help you do the exact thing. I personally use and recommend the Yoast SEO plugin for WordPress, as it’s the best SEO plugin I’ve ever come across. It takes care of almost all the on-page & on-site SEO aspects.
The plugin will simply suggest necessary changes and incorporating those suggestions. Furthermore, Yoast helps you create an XML sitemap which is one of the most important elements that helps search engine informed about the post publishes/updates.
13. Install social media sharing plugins

Did you know that social media sharing is one of the 200 ranking factors that Google users to rank a particular webpage? Don’t miss a single chance for the post to ‘not’ reach your reader’s social media profiles. Use any of the following social media sharing plugins on your WordPress blog:
Kiwi &
14. Enable backups for your blog content
Your blog is an asset, you can’t afford to lose even an inch of it, that’s where backups come into the picture. A lot of times due to a lot of technical reasons, bloggers lose content on their blogs. There are times when a system crashes and you lose the data on your blog.
To do away with it, there are plugins that can backup all your blog data safely. I use UpdraftPlus to backup all my websites. With Updraftplus, you have daily, weekly, or bi-weekly, or monthly backups. The best part is you can store the backup in cloud storage like Google Drive, and OneDrive which is totally free.
See the screenshot below to know the backup options you get. Once you install the plugin, navigate to Settings » Updraftplus.

15. Add/update categories for blog posts
If you are planning to get into content marketing, categories are a must to club all similar posts categorically. The default category for all the blog posts is Uncategorized, you can change this or delete this category. Simply navigate to Posts » Categories. Delete the unwanted categories or update them to save a few seconds of creating them from scratch. Make sure to change its slug as well.
If you are already sure of what categories you will be writing on, create categories for it accordingly. If not sure right away, don’t worry. You can always create new categories anytime, simply head over to Posts » Categories and create any number of categories you want.
Remember the SEO aspect of those categories, you can choose to index your category pages on search engines. If you choose to do so, make sure you design it really well, the world’s gonna see it. Make it that presentable.
16. Change widgets on the sidebar
By default, you may get some widgets on your WordPress blog. This was one of the most important things to do after installing WordPress. As widgets were one of those things that attracted me to join self-hosted WordPress.
Widgets positions and the number depending on the theme you choose. I’m very choosy when it comes to themes supporting widgets. While choosing the theme you can consider the number of widgets it allows and their positions.
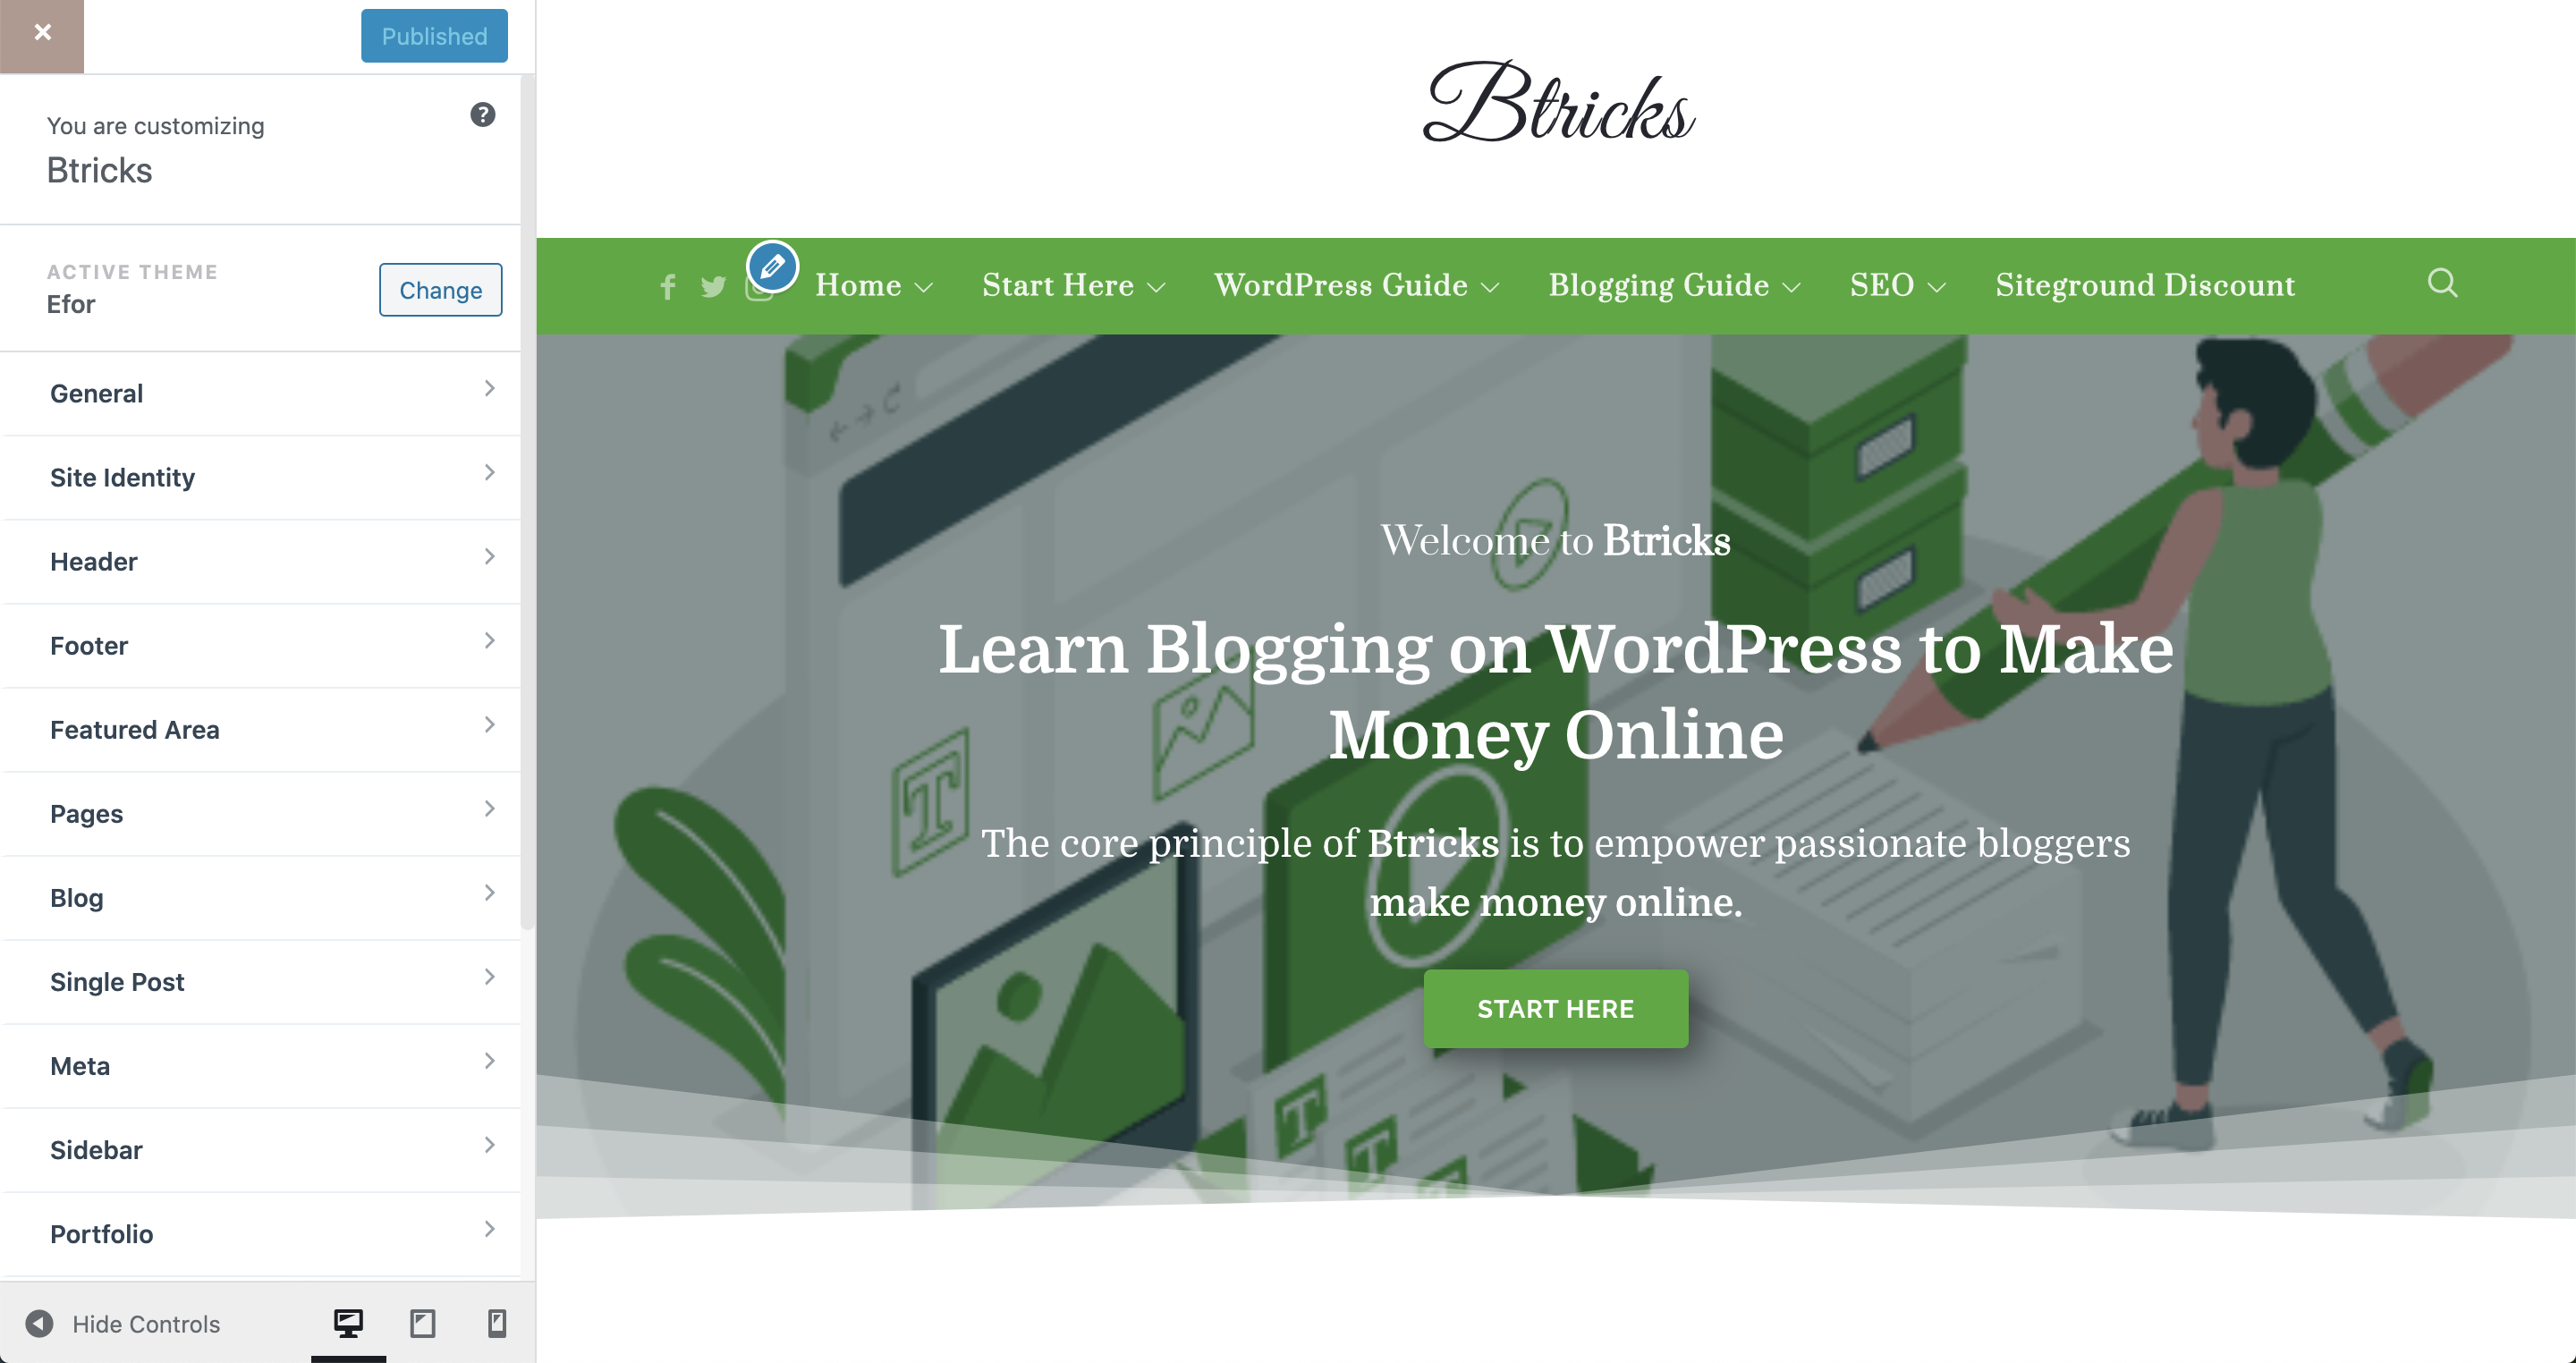
All these settings will make sense only after you install a theme. So once you’ve installed a theme, make sure you update/add the widgets. To add widgets, navigate to Appearance » Widgets or Customize » Widgets.
17. Create a Custom Menu(s)
This is important, as this little thing is going to help end users a lot. This is the navigation window that they’d be using to navigate through different sections of your website/blog. Menus are going to be present on each and every page of your website/blog. So, design it already!
You can find menu settings at Appearance » Menu or Appearance » Customize » Menu. I personally prefer the second option as I have better control over the menu creation process. It’s just that customizer takes a little to load, if you are patient enough, use this method.
Furthermore, you can even design the structure of your menu by creating sub-menus. Simply drag and bring a sub-menu to the right of the main menu and drop it. See the below image to better understand the process of menus & sub-menu creation.
18. Complete your profile and update Gravatar
If you are individually managing your website/blog, a profile is a must to establish yourself along with your brand. To update your profile, navigate to Users » Your Profile. Update all the necessary details that you want the world to see. Customize it just enough to make you feel at home.
Gravatar is the display picture that will be displayed along with your author information. You can update your Gravatar by either directly going to the official website or use the plugin Avatar Manager to update a new picture from your computer.
19. Install and activate themes
I’m sure you are not going to use the default theme. You would need to install another theme to make your website/blog exactly the way you like. To begin with, you can try free themes that are available in abundance in the WordPress theme directory.
However, you can amazing themes from theme developers like ThemeForest, Themify.me, Elegant Themes. Once you download the theme you can upload the theme at Appearance » themes and then click on the Upload theme button. Make sure you upload the zip file of that theme and WordPress will take care of unzipping it.
Once uploaded click on Activate button. The theme will activate and then you can customize it as per your need. It’s all your creativity and needs that will decide how your website will look.
20. Change Admin Email
It’s important to update the admin email address in the dashboard, which I discussed in the previous sections. If you are the admin among many other users with different roles, you’d need to have your email address as the admin email address. All the major activities, like comments, backups, pingbacks, user addition, etc will be sent to your email inbox.
There are two ways you can change the email address:
- Settings » General » Email Address.
- Users » Select your user » Edit » Email.
Remember, there can be only one admin email, and hence chose wisely which one it could be. Furthermore, if you have other users irrespective of their roles, they will have email too but their email will not be considered as the admin. Additionally, if you have multiple admins, only one email among all the admin users will be valid and active at a time.
21. Brand up your WordPress login page
If you are a freelancer and have a client’s site to manage & set up, it would be cool for them to have their business logo on the login page. It feels premium and home.
If you are a webmaster of your client’s site, you can have your logo on the login screen. This way you can market yourself by showing every time your client accesses /wp-login page.
Multiple ways to do that:
Some themes support custom login images, depending on what you can find it. Generally, you can find these settings at Appearance » Theme Options
Use plugins like Uber Login Logo or Custom Login. Uber Login Logo hasn’t been updated for the past 4 years, so I won’t recommend that. However, Custom Login is tried and tested. It’s an amazing plugin to go with. There are many plugins serving this purpose, you can browse through those plugins. Choose what features you want to use and opt for that plugin.
If you are a person who would like to get your hands dirty and DIY, here’s the guide you can use to update the custom logo at the login screen.
Conclusion
The aforementioned steps are sure gonna help you make your WordPress site better and professional. Of course, there can be many other things to do after installing WordPress, but these steps should be the very first to perform. You can change anything anytime here on WordPress if you ever need to.
A good start is a half win.
I’m sure I’ve helped you with a lot of things to do after installing WordPress. You must have been occupied doing these things, it’ll help you make your WordPress site better.
Did you find anything helpful herewith? Which tip is going to add/update first? Is it changing the login logo page or is it plugins that you’ll be removing? Let me know in the comments below. Should you face some issues, let me know in the comments below, I’ll try to help you with it.
Do you know someone who’s looking for this information? Share this post with them also share it on your social network, you never know who finds it useful.

